
How to Migrate from Kit (ConvertKit) to beehiiv, Step by Step (2026)
Move your Kit subscribers, paid members, and newsletter archive to beehiiv: export, import, handle Stripe, rebuild forms and sequences, and wind down Kit safely.
Moving from Kit (formerly ConvertKit) to beehiiv has three parts. Free subscribers move with a CSV export and import. Paid subscribers depend on how your Kit payments are set up: if you use Kit’s built-in Stripe Express connection, beehiiv says they can’t be transferred, so you’ll need a plan for them. Your newsletter archive comes over with beehiiv’s Content Import tool. Forms, sequences, and visual automations don’t transfer, so you rebuild those in beehiiv.
This guide puts those steps in order. It’s based on beehiiv’s official Kit migration guide (updated Sep 3, 2026), beehiiv’s subscriber import and paid subscriber import guides, and Kit’s help center, all checked on October 7, 2026.
How we researched this: We haven’t run a Kit-to-beehiiv migration on our own accounts yet. Every step below comes from beehiiv’s and Kit’s official documentation and public pricing pages. Menu names change, so if a screen looks different, the vendor’s help article is the source of truth.
About our links: beehiiv links on this page are affiliate links (/go/beehiiv). Kit links go through /go/kit, which currently forwards straight to Kit’s homepage; we don’t earn a commission from Kit. Our recommendations would be the same either way.
First: should you leave Kit at all?
Kit and beehiiv overlap a lot, and for some people staying on Kit is the better call. Check these before you migrate (prices from each vendor’s pricing page on October 7, 2026):
- Free plan size. Kit Free covers up to 10,000 subscribers. beehiiv Free covers up to 2,500. If you’re on Kit Free with more than 2,500 subscribers, moving to beehiiv means paying for Lite or Pro.
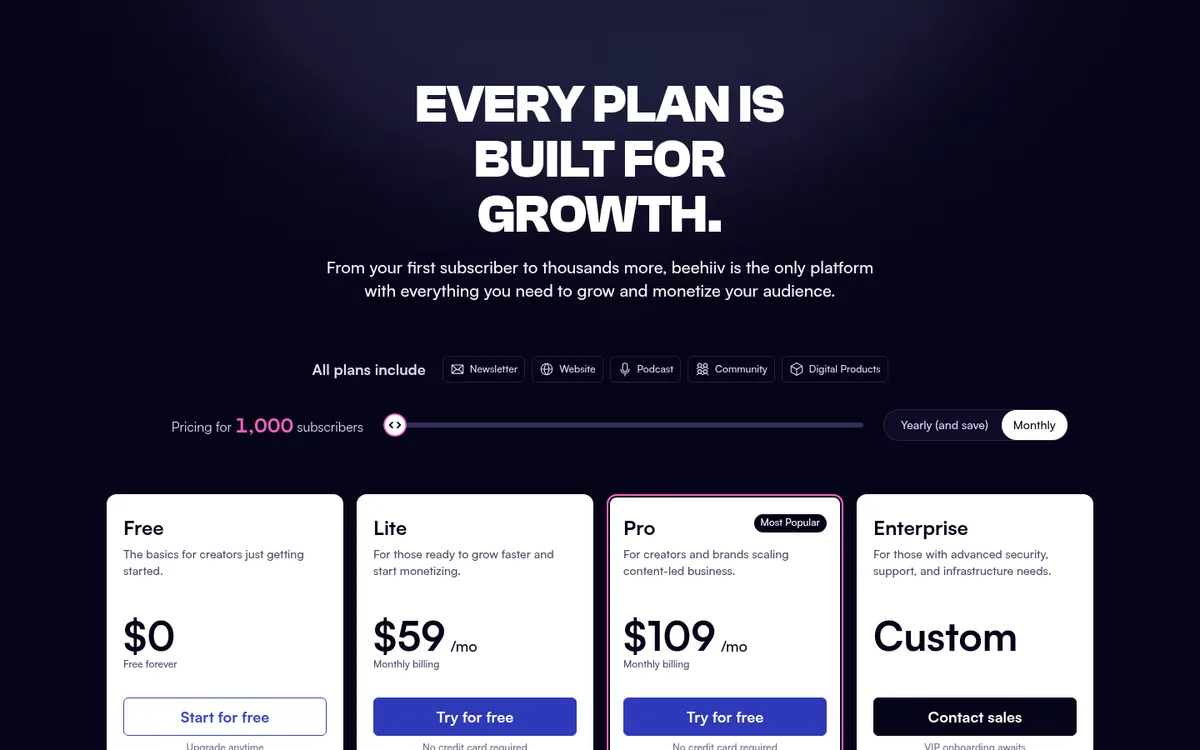
- Cost of automations. On Kit, sequences and visual automations start on Creator, $33/month billed yearly ($390/year) at 1,000 subscribers. On beehiiv, custom automations start on Lite, $49/month billed yearly or $59/month monthly at 1,000 subscribers. Free includes only a welcome email.
- Paid newsletter fees. Kit charges 3.5% + 30¢ per transaction on every plan, which Kit says includes card processing. beehiiv takes 0% of paid subscription revenue, but Stripe’s 2.9% + $0.30 still applies, and paid subscriptions need a paid beehiiv plan (Lite and up).
- Want to stay with Kit but simplify? Kit’s billing help says you can pause or downgrade to the free plan at any time and your data is saved.
beehiiv tends to fit if the newsletter is the product: you want a publication-style website, beehiiv’s ad network, or 0% platform fees once paid revenue is meaningful. For the full side-by-side, see Kit vs beehiiv for solo newsletter writers, Kit pricing explained, and beehiiv pricing explained.
The migration at a glance
- Take inventory of your Kit account
- Pick a beehiiv plan sized for your list
- Export confirmed subscribers from Kit
- Clean the CSV
- Import subscribers into beehiiv
- Decide how to handle paid subscribers
- Create a default post template
- Import your newsletter archive
- Rebuild signup forms and landing pages
- Rebuild sequences and automations
- Connect your custom domain
- Send, check, and wind down Kit
Step 1: Take inventory of your Kit account
Write down what you have before you change anything:
- Confirmed subscriber count. This decides your beehiiv plan (Step 2).
- Tags and custom fields you actually use for targeting
- Forms and landing pages embedded on your website or linked from social profiles
- Email sequences and visual automations: which ones are live and what they send
- Paid newsletter or subscription products, and how payments are connected: Kit’s built-in Stripe Express setup or your own Standard Stripe account (this decides Step 6)
- Your Kit newsletter site URL (you’ll need it for the content import in Step 8)
- A custom domain, if you use one
- Integrations that add subscribers to Kit (your store, course platform, or lead-magnet tools)
Step 2: Pick a beehiiv plan sized for your list
beehiiv’s Kit migration guide is marked for all plans, including Free. Importing paid subscribers needs a paid plan. Here’s what beehiiv’s pricing page showed on October 7, 2026:
| Subscribers | Free | Lite (monthly / yearly) | Pro (monthly / yearly) |
|---|---|---|---|
| 1,000 | $0 | $59/mo / $49/mo | $109/mo / $95/mo |
| 2,500 | $0 | $79/mo / $69/mo | $149/mo / $129/mo |
| 5,000 | Not available | $109/mo / $95/mo | $199/mo / $169/mo |
| 10,000 | Not available | $139/mo / $119/mo | $239/mo / $199/mo |
Yearly prices are shown per month. beehiiv’s FAQ says every plan includes unlimited email sends, yearly billing saves up to 20%, and Lite and Pro include a free trial with no credit card needed. Lite caps at 100,000 subscribers and Pro at 250,000. beehiiv counts unique email addresses subscribed to your publication.
What the plans add, from beehiiv’s feature table:
- Free: website, unlimited sends, a welcome email. No custom automations, custom domains, or paid subscriptions.
- Lite: 10 live custom automations, custom domains, paid subscriptions, the referral program, and 10 site redirects.
- Pro: unlimited live custom automations and site redirects, and removal of beehiiv branding.
Size your plan before you import. beehiiv’s import guide says that if an import would push you over your plan’s subscriber limit and you don’t upgrade, the whole import goes on hold, including subscribers who would have fit. Partial imports aren’t supported. Either upgrade first or trim your CSV.
Step 3: Export confirmed subscribers from Kit
From Kit’s How to export subscribers in Kit (updated Sep 4, 2026) and beehiiv’s Kit guide:
- In Kit, go to Subscribers.
- Click the Status button and choose Confirmed subscriber, so you only export your active list.
- Click the checkbox at the top of the list to select everyone on the page, then click Select all to select every subscriber in your account.
- Click the three dots (⋮), then Export. A pop-up confirms the export is processing.
- Download the file. Kit emails a download link to your Kit account’s email address (and to the account owner, if you’re a team member). In the new navigation, you can also download it from the Notifications panel.
Things to know about the file:
- The most common mistake: if you don’t click Select all, only the subscribers on the current page are exported. Kit says that if the button reads Deselect all, everyone is selected.
- Export links expire after five days. Download right away and keep a backup somewhere permanent.
- Exports include first name, email address, created date and time, status, tags, location (city, state, country), attribution data, and custom fields.
- The export can take several minutes for larger lists.
Step 4: Clean the CSV
A little cleanup prevents most failed imports:
- Only import people who opted in. When you import, beehiiv asks you to confirm that everyone in the file knowingly consented and opted in. Its import guide says importing contacts who didn’t violates beehiiv’s Terms of Service and Privacy Policy and can lead to termination of service. Filtering to Confirmed in Step 3 handles most of this.
- Check the email column header. beehiiv accepts
email,email address, oremailaddress. - Rename reserved fields. Some column names are reserved in beehiiv and can’t be imported as custom fields. beehiiv’s example: rename
citytoimported_city. Kit’s export includes location columns, so check those. - Keep the tags column if you segment by tag. beehiiv can map a column to subscriber tags. If someone has several tags, they go in one cell with no unescaped commas.
- Keep
created_atif you care about original signup dates. beehiiv sets each subscriber’s subscription date to the import date by default. Its Kit guide says to mapcreated_atto a date/time custom field during import, then contact beehiiv support and ask to have the original dates added. - Delete columns you won’t use to make mapping easier.
Step 5: Import subscribers into beehiiv
beehiiv’s Kit guide starts at Settings > Subscribers Import > Import Subscribers. Its newer subscriber import guide (updated Oct 1, 2026) starts from Subscribers > Import subscribers, so your screen may look slightly different. The flow:
- Upload: choose Upload a CSV and select your file.
- Map fields: match each column to a beehiiv field. Your email column is Email address; other values become Custom fields (pick one or click Create new custom field); labels go to Subscriber tags. The Overwrite existing custom field data toggle is on by default. When it’s on, a blank cell deletes an existing subscriber’s value.
- Onboard (optional): apply a tag to the whole batch (something like “Kit import” makes the group easy to find later), or enroll it in a live automation. Automations need a paid plan. Think twice before sending long-time readers a “welcome” email.
- Confirm: review the count, read the opt-in statement, and agree.
beehiiv automatically filters out duplicate, invalid, and inactive emails, so the accepted count can be lower than what you uploaded. Import statuses include Queued, Processing, Completed, Failed, and On hold. If rows are rejected, the import guide’s FAQ covers the common causes.
Step 6: Decide how to handle paid subscribers
Skip this step if you don’t charge on Kit. If you do, beehiiv’s guide splits it into two cases.
If you use Kit’s built-in Stripe Express payments
beehiiv says there’s no way to migrate these paid subscriptions, because Kit doesn’t expose the customer profile, payment method, or subscription details needed to transfer them. It offers two approaches:
- Option 1: Ask paid readers to re-subscribe. Cancel or refund their Kit subscriptions, then email them a link to your beehiiv Upgrade page or a discount offer link.
- Option 2: Give complimentary access. Grant existing paid readers complimentary access in beehiiv for the rest of their current billing period. Email them that their access continues until that period ends, and that they’ll need to subscribe on beehiiv to keep it after that.
Canceling in Kit (either option): beehiiv’s guide says you cancel active Kit subscriptions by deleting the associated subscription product in Kit. Kit then emails subscribers at the end of their billing cycle that the product is no longer available and they won’t be charged again. beehiiv also notes that Kit doesn’t support pro-rated or bulk refunds, so any refund has to be issued one at a time.
Paid subscriptions on beehiiv require Lite or above. We’d set up your paid tiers and connect Stripe in beehiiv before emailing readers, so the Upgrade page works when they click it.
If you use your own Standard Stripe account
beehiiv says that if your Kit setup uses an external Standard Stripe account with full subscription and payment details, you can migrate paid subscribers using its paid subscriber import tool (updated Oct 5, 2026; paid plans). In short:
- Connect a Stripe account to your beehiiv publication.
- In beehiiv, go to Settings > Subscribers import and, under Import paid subscriptions from Stripe, click Start a new migration.
- In Stripe, copy your customers’ payment data from the source account to your beehiiv-connected account and accept the transfer. beehiiv says this can take up to 72 hours (usually faster) and no charges occur.
- Give beehiiv your source Account ID (starts with
acct_) and a restricted API key with read access to customers, products, coupons, and subscriptions. - Map each Stripe product to a beehiiv paid tier, review, and click Start Import.
Migrated subscribers keep their current price, even if the beehiiv tier costs more, and are placed on a temporary trial until their normal renewal date to prevent double billing. After the import, canceling billing in Kit is your responsibility, so subscribers aren’t charged twice.
Step 7: Create a default post template
Do this before importing content. beehiiv’s guide says to build a newsletter template with your preferred styling and select Set as default post style, so it applies to every imported post. After migration, styling can only be changed post by post. beehiiv has pre-built templates to start from.
Step 8: Import your newsletter archive
From beehiiv’s Kit guide:
- Go to Settings > Content Import and select the Kit option.
- Enter your Kit newsletter site URL when prompted. beehiiv’s general content import guide says to enter only the domain (for example
example.com), nothttps://.
Two things to know:
- Paywalled posts: if you have paywalled content on your Kit site, beehiiv says to temporarily make those posts public before importing, then add paywalls back post by post in beehiiv.
- If you don’t see a Kit option: beehiiv’s general content import guide (updated Jun 22, 2026) lists only Substack, WordPress, Mailchimp, Ghost, and Other in the importer’s menu, while the newer Kit guide (Sep 3, 2026) names a Kit option. The menu may have changed between them. If Kit isn’t listed, the general guide says to contact beehiiv support, or you can copy and paste posts into beehiiv’s editor.
Step 9: Rebuild signup forms and landing pages
Kit forms on your website keep sending signups to Kit until you replace them. Swap them early so new readers land in beehiiv.
From beehiiv’s embedded subscribe form guide (updated Jul 27, 2026; all plans):
- Go to Subscribers > Subscribe forms and click Create new form.
- Design and publish it, then copy the embed code.
- Replace each Kit form embed on your site.
Your beehiiv website also has its own subscribe page, which can stand in for a Kit landing page. Update the links in your social bios too. On paid plans, the Email submitted trigger can start an automation when someone fills in a form, which is how you’d rebuild a lead-magnet delivery.
Step 10: Rebuild sequences and automations
beehiiv’s migration overview says platform-specific features such as custom automations, integrations, and workflows that depend on your previous email platform may need to be rebuilt. Plan for your Kit sequences and visual automations to be in that group.
- Plan limits: Free has a welcome email only. Lite allows 10 live custom automations; Pro is unlimited. beehiiv’s automation guide (updated Oct 2, 2026) marks automations as a paid-plan feature.
- How they’re built: each automation needs at least one trigger and one action.
- Templates to start from: beehiiv’s quick-start templates include Welcome email (with re-entry), Lead magnet automation, Paid subscription upgrade welcome email, and a Re-engagement automation flow (90-day inactivity).
A practical way to work: list each live Kit sequence and automation from Step 1, decide whether you still need it, and rebuild only those. If you have more than 10 you want to keep, you’ll need Pro or will have to consolidate. Heavy multi-branch automation is one of Kit’s strengths, so if your business runs on it, weigh that before you move.
Step 11: Connect your custom domain
From beehiiv’s custom domain guide (updated Oct 1, 2026):
- Custom domains are on paid plans (Lite and up).
- You can set up a web domain, a redirect URL, and an email sending domain under Settings > Domains.
- Setup runs through Entri (guided) or manually; beehiiv generates the 12 DNS records to add.
- Verification can take up to 72 hours. Don’t remove and re-add records while you wait.
- Using Cloudflare? Set each beehiiv record to DNS only.
If old Kit post links get traffic from search or other sites, beehiiv’s migration page says redirects can be configured for platforms other than Substack. Lite includes 10 site redirects; Pro is unlimited.
New to sending from your own domain? Our free Newsletter Launch Checklist covers domain authentication (SPF, DKIM, DMARC) and the other basics to check before your first send.
Step 12: Send, check, and wind down Kit
- Send your first beehiiv issue and consider telling readers you’ve moved.
- Catch late signups. If anyone joined through Kit after your export (before you swapped forms), export those subscribers and import them too. beehiiv filters out duplicates.
- Keep your export. Kit’s download links expire after five days, so store the CSV yourself.
- Make sure paid billing has stopped in Kit (Step 6), so no one is charged on both platforms.
- Decide what to do with the Kit account. From Kit’s Billing at Kit help article:
- When you cancel, your account stays active until the last day of your billing period.
- Kit has a 30-day refund policy: if you cancel, you can request a full refund of anything paid in the last 30 days, including on annual plans. It doesn’t refund or pro-rate payments older than that.
- You can pause or downgrade to the free plan at any time. Kit says your data is saved and you can return later at the then-current plan price.
Downgrading to Kit Free (instead of deleting) keeps a fallback while you confirm everything works on beehiiv. That’s a cautious approach, not a vendor requirement.
What doesn’t carry over
- Kit Stripe Express paid subscriptions (readers need to re-subscribe, or get complimentary access first)
- Sequences and visual automations (rebuild them in beehiiv Automations)
- Forms and landing pages (create beehiiv forms and replace the embeds)
- Original signup dates, by default (map
created_at, then ask beehiiv support) - Paywalls on imported posts (re-add them post by post)
- Unconfirmed and unsubscribed subscribers (export Confirmed only)
Need help?
beehiiv points to its beehiiv Experts Directory, where third-party specialists offer paid migration services. Coming from somewhere else? See How to migrate from Mailchimp to beehiiv or How to migrate from Substack to beehiiv. Still choosing a platform? Our Best newsletter platform for beginners guide compares the main options.
Start your beehiiv account · Compare Kit vs beehiiv first
What we’ll add after hands-on testing
Once we’ve run a Kit-to-beehiiv migration on real accounts, we’ll update this guide with:
- Screenshots of the Kit export and beehiiv import and Content Import screens from those accounts
- How long a real subscriber import and archive import took
- Notes on how imported Kit posts looked in beehiiv’s editor
Until then, treat this as a step-by-step map built from official documentation, not a first-hand report.
Sources
All checked October 7, 2026.
- beehiiv: How to migrate from Kit to beehiiv (help article, updated Sep 3, 2026; all plans; export and import steps,
created_atsignup dates, Stripe Express limitation and two options, deleting Kit subscription products, no pro-rated or bulk refunds in Kit, Standard Stripe path, default post style, Kit content import, paywalled posts) - beehiiv: How to import free subscribers and map custom fields or tags (updated Oct 1, 2026; import flow, opt-in confirmation, header and reserved-field rules, overwrite toggle, on-hold imports, duplicate filtering)
- beehiiv: How to import paid subscribers (updated Oct 5, 2026; paid plans; Stripe data copy up to 72 hours, restricted key, tier mapping, legacy prices kept, trial until renewal, cancel old billing)
- beehiiv: How to import previous content into beehiiv (updated Jun 22, 2026; importer menu, domain-only URL entry, contact support for other platforms)
- beehiiv: Pricing (Free / Lite / Pro prices at 1,000, 2,500, 5,000, and 10,000 subscribers, monthly and yearly; feature table; FAQ on unlimited sends, subscriber counting and caps, free trials, yearly savings, 0% take and Stripe fees)
- beehiiv: Migrate to beehiiv (automations and integrations may need rebuilding; redirects for non-Substack platforms)
- beehiiv: How to use a custom domain for your publication (updated Oct 1, 2026)
- beehiiv: Creating an embedded subscribe form (updated Jul 27, 2026)
- beehiiv: Types of workflows: How to create automations for your subscribers (updated Oct 2, 2026)
- Kit: How to export subscribers in Kit (updated Sep 4, 2026; export steps, Select all, five-day link expiry, exported fields)
- Kit: Billing at Kit (cancellation timing, 30-day refund policy, pause or downgrade to free)
- Kit: Pricing (Free up to 10,000 subscribers; Creator $33/mo billed yearly at 1,000 subscribers; 3.5% + 30¢ transaction fees; sequences and visual automations on Creator)
- Related AudienceBench guides: Kit vs beehiiv, Kit pricing explained, beehiiv pricing explained, Migrate Mailchimp to beehiiv, Migrate Substack to beehiiv